The ilo advanced key is not displayed completely in the HTML interface and is censored by XXXX
You can display it as xml with the following URL:
https://IP-ADDRESS/xmldata?item=cpqkey

The ilo advanced key is not displayed completely in the HTML interface and is censored by XXXX
You can display it as xml with the following URL:
https://IP-ADDRESS/xmldata?item=cpqkey
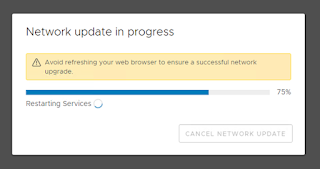
The update of a virtual switch vs0 failed at nutanix single node clusters because the cluster is unable to perform a rolling reboot. You have to convert the switch and change the uplinks via the old manage_ovs commands and convert it back:
i. manage_ovs
--bridge_name br0 --interfaces <interface names>
--bond_name br0-up --bond_mode
balance-tcp --lacp_mode fast --lacp_fallback true update_uplinks
i. manage_ovs
--bridge_name br0 --interfaces <interface names>
--bond_name br0-up --bond_mode <active-backup/balanced-slb> update_uplinks
If you got problems at expanding your cluster with nodes from different vendor, be carefull as this is not supported. Sometimes you have to do this to replace all nodes of a cluster with new ones from a different vendor, so do this only for migration purposes, never run a mixed vendor config in production environments!
(In our case, we replaced Nutanix NX-Nodes with HPE DX)
Maybe the expand fails, as the new vendor has a different license class , so you can edit the file:
/etc/nutanix/hardware_config.json on the nodes, you want to add:
In the section
"hardware_attributes":
you will find an entry
"license_class": "software_only",
Remove this entry on all nodes you want to add and perform a genesis restart on this node. (You have to use sudo to edit the file!)
After expanding the cluster and removing the old nodes, put this entry back in the hardware_config.json and perform an allssh genesis restart on the cluster.
Then everything should be fine.
Maybe you also get an error at the prechecks from test_cassandra_ssd_size_check even if your SSD-Sizes are fine according to KB-8842
Then maybe your /etc/nutanix/hcl.json file on the existing cluster doesn't contain the SSDs in the new nodes. In this case check the hcl.json on the new nodes if this contains the SSDs. In this case copy the hcl.json from one of the new nodes to all CVMs in the running cluster, perform allssh genesis restart at the cluster and try again.
(Copy the file somewhere to /tmp and then use sudo mv to get it to /etc/nutanix/)
Maybe, Licensing of the "converted" Cluster may not work as expected, as the cluster thinks , he is still on "license_class": "appliance".
You can check your downloaded csf for the license class of the Nodes, if this is wrong, engage Nutanix support, they will provide a script to check and to set:
python /home/nutanix/ncc/bin/license_config_zk_util.py --show=config
python /home/nutanix/ncc/bin/license_config_zk_util.py --convert_license_class --license_class=<software_only/appliance>
to fix this in PC Versions prior to PC pc.2023.1.0.2 .
Later Versions has the ability to use "ncli license update-license license-class="<software_only/appliance>".
After updating wait about 1 hour, then you can try licensing from PC again (check the csf, if the Nodes now show the correct license_class)
Sometimes after removing a node (or all, in case of renewing the hardware) you can't reach the virtual cluster ip (cvms are reachable) or you can't resolve alerts. In this case Prism leader did not change correctly to a new node. You can fix this by restarting Prism:
allssh genesis stop prism;cluster start
Error occurred while fetching tls: String index out of range: -1

If you've got this error while replacing the Certificate through the UI Interface, try to not use the "Browse file" dialog. Just open the certificate in Text editor and copy/paste it in the required field.

If somebody accidentaly updated Firmwares on a HPE DX Node manually, it won't be possible to install Firmwares (SPP) on the node via LCM, as Nutanix expects special Versions of SPP on the node. (In LCM hover over the Question mark an it shows you, wich Versions are supported for Update)
You can fix this and make LCM believe, you have such a version (but be careful, it should be a SPP-version, that reflects the FW-Versions, that are installed):
You should ssh to the affected host and then:
[root@host ~]# export TMP=/usr/local/tmpdir
[root@host ~]# ilorest --nologo login
[root@host ~]# ilorest --nologo select Bios. The dot is important!
[root@host ~]# ilorest --nologo get ServerOtherInfo
Now you can see, the Version of SPP the node has
Set the version to nothing, if something wrong is inside:
[root@host ~]# ilorest --nologo set ServerOtherInfo='' --commit
Set the version to the correct expected version:
[root@host ~]# ilorest --nologo set ServerOtherInfo='2021.04.0.02' --commit
Check, if everything is fine:
[root@host ~]# ilorest --nologo get ServerOtherInfo
[root@host ~]# ilorest --nologo logout
No you can perform a LCM Inventory and the SPP-Update should be possible
If the kb article 1540 at Nutanix to clean up the CVMs does not help, the clickstream folder can be cleaned up.
please run the following command on the affected cvm
find ~/data/prism/clickstream -name 'client_tracking*' -mmin +7200 -type f -exec /usr/bin/rm '{}' +
and cleanup /data/prism audit-logs with e.g. (in folder /data//prism)
/bin/rm api_audit-2022*
To view current password age for admin user, execute chage command as follows:
nutanix@cvm$ sudo chage -l admin
Last password change : May 22, 2007
Password expires : never
Password inactive : never
Account expires : never
Minimum number of days between password change : 0
Maximum number of days between password change : 99999
Number of days of warning before password expires : 7
To disable password aging / expiration for user admin , type command as follows and set:
Minimum Password Age to 0
Maximum Password Age to 99999
Password Inactive to -1
Account Expiration Date to -1
nutanix@cvm$ sudo chage -m 0 -M 99999 -I -1 -E -1 admin
If LCM Firmwareupdates (i.g. HPE DX SPP Updates) cannot be applied, you can try the following steps:
1. Clear Browser Cache
if clearing does not solve the problem you can "reset" your lcm by catalog cleanup from any of the CVMs:
Run the following 4 commands one by one:
- python /home/nutanix/cluster/bin/lcm/lcm_catalog_cleanup
- python /home/nutanix/cluster/bin/lcm/lcm_catalog_cleanup --lcm_cleanup_cpdb
- allssh genesis stop catalog; cluster start
- cluster restart_genesis
After this, please retry performing inventory.
If you can't register vCenter in Nutanix as a wrong IP is discovered, check vpxa.cfg on the ESXi Hosts. Possibly you have to change the vpxa.cfg on the hosts. This mainly happens, after changing VCSA IP and/or hostname. First check, if vCenter can communicate with the hosts.
If Communication is established and it's not possible to permanently change the configuration or VMware changes back the configuration automatically, you may have a look on this setting in the VCSA (IP Address missing, Name wrong etc):

Change VCSA FQDN and IP in a Nutanix Environment:
First, check everything is up an running and there are no problems at all.
Be sure, you have all needed credentials (SSO-Admin, Domain Admin. etc...)
Be sure you have the new fqdn and the new IP as well as the corresponding DNS-Entry. An eventually new VLAN should be available on your vSphere Environment.
First, take a backup (snapshot) of your VCSA.
Then uninstall vCenter Plugins an unregister your vCenter from your Nutanix PRISM:


To check the Redundancy Factor of the Cluster:
ncli cluster get-redundancy-state
To check the Container Redundancy Factor:
ncli ctr ls|egrep -i "Name |Replication"
To change the RF-Mode of a Nutanix Storage Container, first show the Conatainer Details:
ncli ctr ls
Identify the correct Container and note the ID of it (all digits after the :: on the ID line)
For example:
ID : 00052c80-729d-8761-000000052fb::1085
Change the Conatiner RF Mode:
ncli ctr edit rf=RF-Mode id=Container_ID (force=true)
For example:
ncli ctr edit rf=3 id=1085
For the NutanixManagementShare Container, you need the additional force=true Parameter
To check which NIC is active please connect to the AHV host, run the following command:
[root@ahv ~]# ovs-appctl bond/show
In the command output, the active interface will be marked as an active slave.AHV
To Reset IPMI via ipmitool (if not responding etc)
you can connect to an AHV Host and then
ipmitool mc reset cold
or you can do this for the whole cluster from CVM with:
hostssh "ipmitool mc reset cold"
This resets all IPMIs in the cluster.
To add an user you can check via
ipmitool user list 1
wich userspace is unused.
then
** User create on 3
ipmitool user set name 3 ILOUSER
** User set password for 3
ipmitool user set password 3 PASSWORD
** User set Admin privileges (4)
ipmitool channel setaccess 1 3 link=on ipmi=on callin=on privilege=4
**Enable User 3
ipmitool user enable 3
You can use all of these commands from CVM with hostssh in " "
to set this for the whole cluster.
Example hostssh "user set name 3 USER"
ESXi
On an ESXi Host you can use ./ipmicfg wich can do most in one command:
hostssh "./ipmicfg -user add <ID> <NAME> <PASSWORD> <PRIVILEGE>"
Example:
hostssh "./ipmicfg -user add 3 ADMIN P@ssw0rd 4"
To reset the BMC use:
./ipmicfg -r
To disable HA completely on the cluster, use the
following command from nutanix user of any CVM in that cluster:
acli ha.update enable_failover=0
acli ha.get
After running acli ha.get, you should see 'ha_state:
"kAcropolisHADisabled"' and also on Prism dashboard under VM Summary
widget.
To re-enable HA, please use the following command:
acli ha.update enable_failover=1
acli ha.get
This command disables HA on the complete cluster and not on individual node. It is recommended to disable HA only if it is absolutely required.
1. Access to the
(VCSA) the Appliance Management. https://vcsa_ip:5480
2. Navigate
to Access and click Edit under Access
Settings.
3. Switch on Enable
SSH Login and click OK.
4. Access to the
VCSA via SSH.
5.
Type: Shell
6. Change the
default Shell to Bash typing: chsh -s /bin/bash root
Now you should be able to access VCSA with WinSCP with the following settings:
Use "scp" on port 22.
(tested with VCSA 6.7)
First check, that everything is fine in your cluster.
To manually change the amount of Memory of CVM, first logon to the CVM and shutdown the CVM via the cvm_shutdown script:
cvm_shutdown -P
Then logon to the correspondig AHV Host and list all VMs:
virsh list --all
Check, that you see your CVM powered off
then continue to change the Memory config:
virsh setmem <CVM_NAME> <Gigabytes>G --config
virsh setmaxmem <CVM_NAME> <Gigabytes>G --config
Example: virsh setmem NTNX-CVM1 36G --config
You can check if this succeeded:
virsh dominfo <CVM_NAME>
then you can power on the CVM again:
virsh start <CVM_NAME>
Wait for the CVM to come up and go to the GUI and wait for everything gettin normal (especially the Data Resiliency Status should change back to OK).
After everything is ok, you can continue with the next CVM.
You can use the external IP address reconfiguration script in the following scenarios:
Change the IP addresses of the CVMs in the same subnet.
Change the IP addresses of the CVMs to a new or different subnet.
In this scenario, the external IP address reconfiguration script works successfully if the new subnet is configured with the required switches and the CVMs can communicate with each other in the new subnet.
Change the IP addresses of the CVMs to a new or different subnet if you are moving the cluster to a new physical location.
In this scenario, the external IP address reconfiguration script works successfully if the CVMs can still communicate with each other in the old subnet.
Following is the summary of steps that you must perform to change the IP addresses on a Nutanix cluster.
Check the health of the cluster infrastructure and resiliency (For more information, see the Before you begin section of this document.)
Stop the cluster.
Change the VLAN and NIC Teaming configurations as necessary.
Note: Check the connectivity between CVMs and hosts, that is all the hosts must be reachable from all the CVMs and vice versa before you perform step 4. If any CVM or host is not reachable, contact Nutanix Support for assistance.
Change the CVM IP addresses by using the external_ip_reconfig script.
Change the hypervisor host IP addresses if necessary.
Restart the CVMs.
Perform the initial series of validation steps.
Start the cluster.
Perform the final series of validation steps.
Change the IPMI IP addresses if necessary.
Note: Please be sure to follow the steps in the order given
The external IP address reconfiguration script performs the following tasks:
Checks if the cluster is stopped.
Puts the cluster in reconfiguration mode.
Restarts Genesis.
Prompts you to type the new netmask, gateway, and external IP addresses, and updates them.
Updates the IP addresses of the Zookeeper hosts.
For detailed information on each step for automated method. Please refer to the following portal document:
The host IPs can be changed directly from the DCUI if the hypervisor is ESXi and if the hypervisor is AHV please follow the process mentioned in the following document:
1. Check the installed softwares and check of NGT was installed before being removed
2. check using powershell if the NGT Infra Component Packages are still present after removing the "old" NGT:
Get-wmiobject -class win32_product -filter "Name = 'Nutanix Guest Tools Infrastructure Components Package 1'"
then remove it:
Get-Package -Name "Nutanix Guest Tools Infrastructure Components Package 1" | Uninstall-Package -Force
3. clean the registry in HKLM\SOFTWARE\Microsoft\Windows\CurrentVersion\Uninstall and "find" Nutanix - delete the key.
4. Reinstall NGT
You will receive the following error message in Prism Element:
System has x aged third-party backup snapshot(s) and they may unnecessarily consume storage space in the cluster.
To show the Configuration (from any CVM):
hostssh "./ipmitool lan print 1"
apply settings that IPMI does not get locked:
hostssh "./ipmitool lan set 1 bad_pass_tresh 0 0 0 0"
you can use following command to remove the NVIDIA driver from ahv with the following command:
yum remove NVIDIA-vGPU-ahv-2019-440.121.x86_64
please replace the NVIDIA-vGPU-ahv-2019-440.121.x86_64 with your current installed driver